
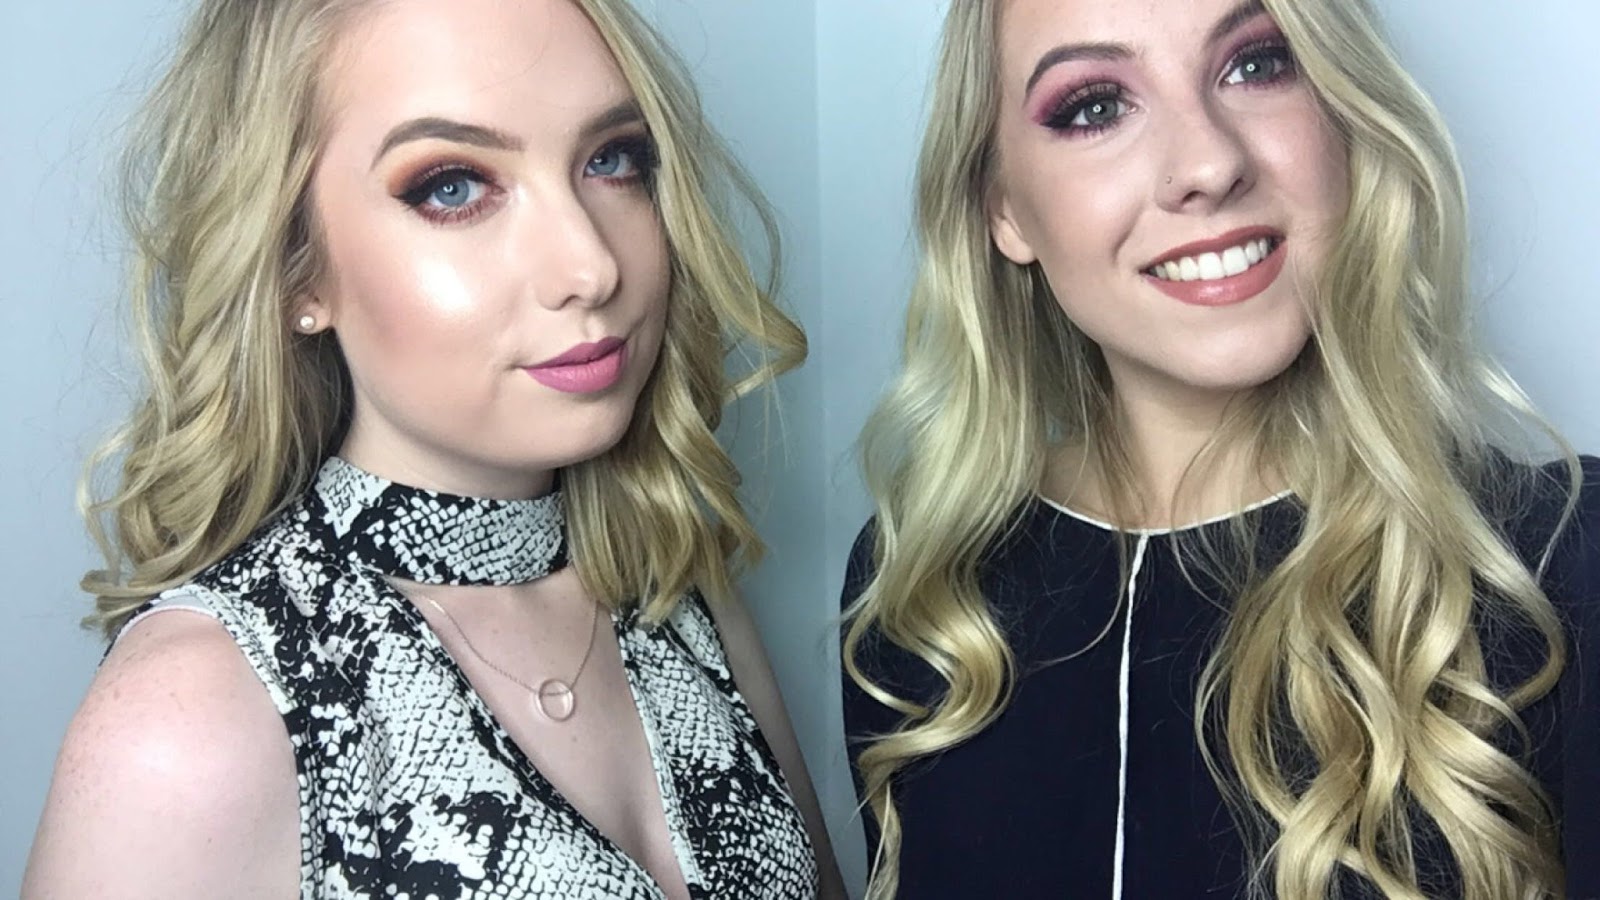
Hey everyone, hope you are all well and enjoying your day. Todays blog post is very exciting as its the first in my new series of One Product Two Looks posts which I am collaborating on with the gorgeous Lydia. The owner of http://lydiakateashley.blogspot.co.uk. Lydia and I have very different makeup styles so we had the idea of using the same products but showing you how versatile each product is and give you two different tutorials and two different looks that you guys can create from the products we feature.
We really hope you guys like the posts in this new series and I'm super excited to be working with Lydia on a more regular basis. So keep an eye out for posts from this series and other collaboration posts with Lydia as well as different personal posts. Be sure to check Lydia's blog out after you've read this one! Please feel free to suggest any products you want us to create looks with, and keep sending your post suggestions and comments. I love creating content you guys can enjoy.

The main product focus for our looks was the Violet Voss Holy Grail Eyeshadow palette which is available at Beauty Bay for £40 http://www.beautybay.com/cosmetics/violetvoss/holygraileyeshadowpalette/ . This palette is fabulous for someone who wants a palette where you can create an everyday look and a more out there night time look. Theres also a good range of matte and shimmery eyeshadows. I really enjoyed using it! However, there are a few things to bare in mind before purchasing, the shadow is very very powdery, meaning while its very easy to blend and create a flawless finish, there is so much fall out so I would advise putting on foundation after doing your eye makeup. The colours were very pigmented too, although some of the colours surprised us on application as the reds were more pinky then red as well as this the colour appeared really different of camera then it did in real life, which I've never had before.


The Eyes.
1) Using Mac's Paint pot is soft ochre I applied on the lid all the way up to the brow bone, this creates a tacky base for the eyeshadow to stick too.
2) Next I used the shade 'Thanks A Latte' and patted this over the top all over the lid packing the colour on to create a lighter base.
3) On a fluffy blending brush I applied the colour 'Transition' in to the crease, blending as I go, this starts to really create a bit of definition.
4) On a more dense blending brush I then went in with the shade 'Hashtag' and again applied to the crease, on the same brush I blended the two previous colours with the shade ' R u Kitten Me'. Taking a clean fluffy blending brush I blended everything together.
5) Taking a pencil brush I took the shade 'Brownie points' and applied to the outer corner, creating more definition I took the shade 'Teddy Bear' and applied in the outer corner and bringing it through the crease.
6) On a flat brush I took the shade 'Cranberry splash' and patted over the whole of the lid, on the same brush I repeated this process with ' On fleek' and 'glamping' and this created a nice red colour that merged nicely with the crease colours. Please note this looked a lot more red in person, but the colour didn't pay off on the camera.
7) To create a spotlight effect of highlight I applied 'Cool Beans' and 'Ploof' on a small wet flat brush and patted straight on the centre of the lid.
8) Taking my index finger I applied the colour 'crystal' to my inner corner of my eye to give that pop of colour and really brighten the eyes.
9) Next I took a liquid black eyeliner and followed the lash line creating a slight flick.
10) On a very small liner brush I took 'Glamping' through the lower lash line to add more drama to the eyes.
11) I popped on some eyelure lashes No.083 and coated the rest of my lashes with Arbonne Mascara.
The rest of the face
Primer: Arbonne
Eyebrows: Loreal Paris Paradise Pomade in warm blonde
Foundation: Arbonne in Alabaster
Contour : Anastasia Beverly Hills Contour palette.
Concealer: Arbonne in fair
Setting Powder: Arbonne setting pretty translucent powder
Contour powder: Kat Von D Palette
Bronzer: Arbonne
Highlight: ABH glow kit in Moonstone
Lips: Kat Von d Liquid lipstick in Lovesick

Be sure to check out the amazing look Lydia created, http://lydiakateashley.blogspot.co.uk I loved it.
Lydia's blog http://lydiakateashley.blogspot.co.uk
Instagram https://www.instagram.com/lydiakateashley/
My Instagram https://www.instagram.com/livimarsh22/
Thank you for reading and I hope you guys Enjoyed!
Lots of Love
Liv x

.JPG)


0 comments